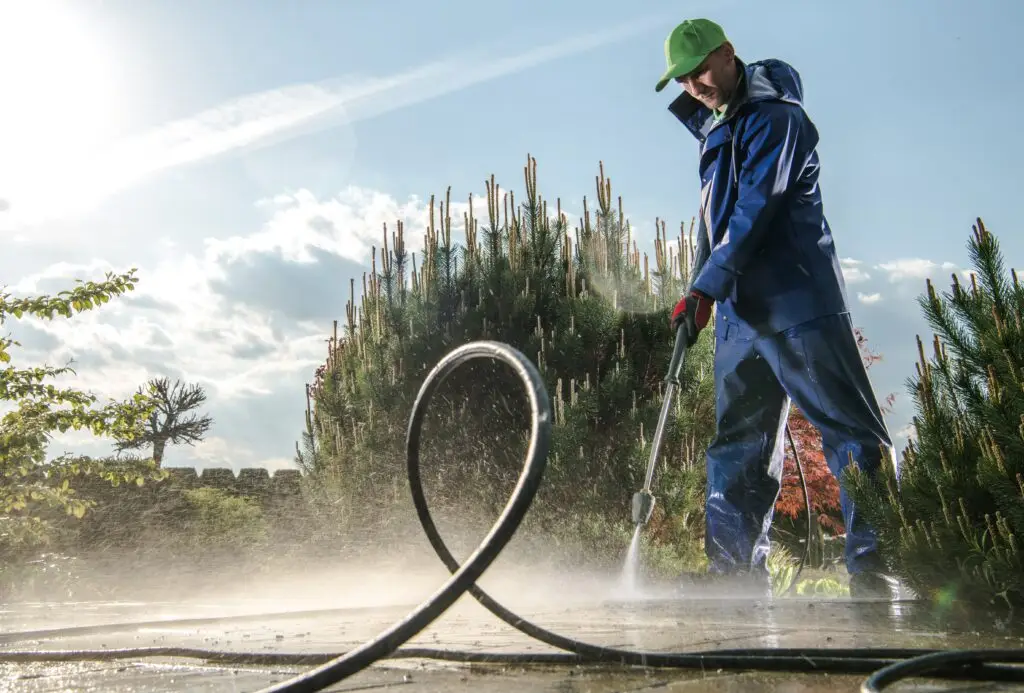
Have you ever struggled to remove tough oil stains from your driveway or clean delicate wood surfaces without causing damage? With over 12 years in the cleaning industry, I understand these challenges. In this blog post, I’ll share effective pressure cleaning techniques for concrete, wood, and brick surfaces. You’ll learn how to use the right water pressure and tools to achieve spotless results every time. By following these methods, you can maintain your property’s appearance and extend the life of your surfaces with ease.
Key Takeaways
- evaluate surface materials before pressure cleaning to prevent damage
- choose suitable pressure settings based on surface type and condition
- use appropriate cleaners and techniques for different surfaces
- protect surrounding areas to avoid accidental damage during cleaning
- implement maintenance strategies to ensure long-lasting cleanliness
Understanding Pressure Cleaning Techniques for Different Surface Types

When pressure cleaning different surfaces, it’s essential to evaluate materials like concrete, metal, glass, and various flooring types. Selecting the right technique and appropriate soap ensures effective and safe cleaning. In the following sections, I will outline specific methods tailored to each surface, providing practical insights to achieve spotless and long-lasting results.
Evaluating Surface Materials for Optimal Pressure Cleaning
Properly evaluating surface materials is essential to ensure effective pressure washing without causing damage. Different surfaces such as concrete, metal, and wood respond uniquely to varying pressure levels, cleaners, and abrasives. Here are the key factors I consider when assessing surfaces for optimal pressure cleaning:
- Surface type and material composition
- Current condition and presence of damage
- Appropriate pressure settings and cleaner selection
- Use of abrasives based on surface sensitivity
- Protection of nearby furniture and textiles
Pressure Cleaning Techniques for Concrete Surfaces

When pressure cleaning concrete surfaces, I choose the right pressure setting to accommodate different materials like paint and plastic fixtures. For removing stains and oil, I apply effective detergents and cleaning agents, using brushes for thorough coverage. Finally, I implement maintenance strategies to keep the concrete in excellent condition.
Choosing the Right Pressure Setting for Concrete
When selecting the appropriate pressure setting for cleaning concrete, I consider the surface’s porosity and the type of dirt or stains present. For tackling stubborn grease and oil stains, a higher pressure is effective, while gentler settings are ideal for delicate areas like concrete countertops to prevent damage. By adjusting the pressure based on these factors, I ensure thorough removal of dirt and stains without compromising the integrity of the concrete.
Techniques for Stains and Oil Removal
When addressing stains and oil on concrete surfaces, I utilize a combination of specialized detergents and high-pressure settings to effectively break down and remove stubborn residues. For instance, oil spills from sources like copper machinery or leather goods can be challenging, but with the right approach, including targeting dust and rock contaminants, I ensure the concrete returns to its pristine condition:
- Pre-treating stains with eco-friendly detergents
- Applying high-pressure water to loosen oil and dirt
- Using brushes for enhanced agitation on tough spots
- Rinsing thoroughly to remove all cleaning agents and residues
- Implementing preventive measures to protect against future stains
Maintaining Concrete After Pressure Cleaning
After pressure cleaning concrete, I ensure that ceramic surfaces in the kitchen are thoroughly dried to prevent any risk of water damage or mold growth. I also take care to protect nearby iron fixtures from residual moisture, which can cause rusting over time. For any follow-up questions or maintenance tips, I encourage clients to reach out via email, ensuring their surfaces remain spotless and durable.
Pressure Cleaning Techniques for Wooden Surfaces

When pressure cleaning wooden surfaces, selecting safe pressure levels for hardwood is crucial to avoid damage. I begin by prepping the wood, ensuring all dirt and debris are removed using appropriate disinfectants. After cleaning, I focus on preserving the wood finish, protecting it from rust and maintaining its natural beauty.
Selecting Safe Pressure Levels for Wood
When selecting safe pressure levels for wood, I carefully assess the surface’s condition and existing varnish to prevent damage. I also protect nearby materials like aluminium fixtures and marble surfaces by using sandpaper shields where necessary. To ensure effective yet gentle cleaning, I follow these key steps:
- Evaluate the wood’s current finish and integrity
- Set the pressure to a level that cleans without harming the surface
- Protect surrounding materials like aluminium and marble
- Select appropriate nozzles for optimal results
- Conduct post-cleaning inspections to maintain wood quality
Prepping Wooden Surfaces Before Cleaning
Before I begin pressure cleaning wooden surfaces, I ensure the temperature is optimal to avoid rapid drying or moisture buildup that can affect the wood’s integrity. I meticulously remove all debris and protect surrounding stainless steel fixtures and tile areas to prevent any accidental damage during the process:
- Inspect the wood for existing damage or wear
- Clear the area of leaves, dirt, and other debris
- Cover nearby stainless steel and tile surfaces with protective materials
- Adjust the temperature to an ideal range for effective cleaning
- Test the spray on a small, hidden section to ensure safety
Preserving Wood Finish Post-Cleaning
To preserve the wood finish post-cleaning, I carefully inspect the surfaces for any signs of mold and address them promptly to prevent long-term damage. Using a soft sponge, I gently clean the walls and avoid aggressive sanding, which can strip away the protective layers and lead to corrosion of adjacent metal fixtures. Additionally, I apply a specialized sealant to safeguard the wood against moisture and maintain its natural beauty.
Pressure Cleaning Techniques for Brick and Stone Surfaces

Effective pressure cleaning of brick and stone surfaces requires selecting the appropriate nozzle to ensure thorough cleaning without damage. Addressing mold and mildew is essential for maintaining earthenware structures, while protecting mortar joints prevents deterioration. By using the right machine settings and managing heat application, I ensure that tableware areas around your property remain pristine and your brickwork stays intact.
Appropriate Nozzle Types for Brick and Stone
Choosing the appropriate nozzle type is crucial when pressure cleaning brick and stone surfaces to prevent damage while effectively removing contaminants. I often use fiber nozzles for gentle cleaning of delicate materials like lacquer finishes, and brass nozzles for more robust tasks that require higher pressure to tackle stubborn substances. Understanding the properties of your surface and the nature of the contamination ensures the best results:
| Nozzle Type | Pressure Range (PSI) | Best Use Cases |
|---|---|---|
| Fiber Nozzle | 500-1500 | Delicate surfaces, light contamination, lacquer finishes |
| Brass Nozzle | 1500-3000 | Heavily soiled areas, tough substances, stubborn stains |
| Adjustable Nozzle | 500-3000 | Versatile applications, varying contamination levels |
Addressing Mold and Mildew on Brick
When addressing mold and mildew on brick surfaces, I utilize solutions like sodium bicarbonate to effectively remove growth without damaging the material. This method ensures that nearby elements, such as clay planters or bone china displayed outdoors, remain safe from harsh chemicals. Additionally, careful pressure settings help protect fixtures like dishwashers and preserve existing graffiti, maintaining both the cleanliness and character of your property.
Protecting Mortar Joints During Cleaning
In my experience, safeguarding mortar joints during pressure cleaning is essential to preserve the integrity of brick and stone structures, especially in areas near food preparation surfaces. I take care to protect adjacent materials such as plywood, laminated glass, float glass, and granite countertops from high-pressure water and cleaning agents. This meticulous approach prevents damage to fixtures like granite surfaces used for food areas, ensuring that both the mortar joints and surrounding elements remain secure and undamaged.
Pressure Cleaning Techniques for Glass and Windows

In pressure cleaning glass and windows, selecting the proper tool is crucial to avoid streaks and reach difficult areas. Unlike cleaning carpets or using steel wool on metal, glass demands gentle yet effective methods. My approach ensures spotless windows without damage. For specific inquiries, please contact me through my email address.
Best Practices for Cleaning Different Glass Types
When cleaning safety glass around cooking areas, such as oven doors and kitchen windows, I ensure that any tarnish or grease buildup is effectively removed without compromising the glass’s integrity. Using specialized cleaners, I meticulously document the cleaning process to maintain high standards and provide homeowners with spotless, clear surfaces that enhance both safety and aesthetics in the kitchen.
Avoiding Streaks and Smudges Post-Cleaning
To prevent streaks and smudges after pressure cleaning glass and windows, I rely on high-quality microfiber cloths to achieve a flawless finish. Before cleaning, I use a vacuum cleaner to remove any loose debris from nearby upholstery and cork areas, ensuring no particles interfere with the process. Additionally, I avoid using harsh chemicals like turpentine, opting instead for specialized glass cleaners that leave surfaces clear and spotless.
Tips for Hard-to-Reach Window Areas
For hard-to-reach window areas, especially those surrounded by alloy frames or bronze accents, I use specialized scrubbers to effectively remove moss and debris without causing damage. Positioning the scrubber near tree branches ensures that even the most secluded spots receive thorough cleaning. This approach guarantees clear, streak-free windows while preserving the integrity of your window fixtures.
Pressure Cleaning Techniques for Vinyl and Aluminum Siding

When cleaning vinyl and aluminum siding, understanding pressure limitations is vital to avoid damage. I use specific techniques to remove dirt and grime effectively, ensuring the longevity of your siding. Whether addressing driveway stains or maintaining cabinetry and wire fixtures in Sydney, I select appropriate solvents and methods for lasting cleanliness.
Understanding Pressure Limitations for Different Siding
When determining the appropriate pressure for cleaning vinyl and aluminum siding, I consider each material’s resilience. For vinyl, I use a gentle mixture of dishwashing liquid and water to avoid damage, while aluminum siding can handle slightly higher pressure. Additionally, for surfaces treated with shellac or containing fiberglass elements, I lower the pressure further and use soft paper towels for drying to maintain their integrity and appearance.
Techniques to Remove Dirt and Grime From Siding
When removing dirt and grime from vinyl and aluminum siding, I prioritize cleaning methods that safeguard both the health of your environment and the integrity of your property. I avoid using harsh acids that can etch surfaces or potentially damage nearby cut glass fixtures, instead opting for gentle yet effective cleaning solutions. This careful approach ensures that the siding remains in excellent condition, similar to the precise annealing process used to maintain metal strength.
Ensuring Longevity of Vinyl and Aluminum Siding Post-Cleaning
To ensure the longevity of vinyl and aluminum siding after pressure cleaning, I prioritize minimizing wear and tear by utilizing appropriate tools like mops and squeegees. Protecting the roof areas from excessive water exposure is also essential to maintain the integrity of your property’s exterior. Proper documentation of maintenance procedures, often stored in PDF format, helps in tracking the condition and effectiveness of cleaning efforts:
| Maintenance Task | Recommended Tool | Frequency |
|---|---|---|
| Removing residual moisture | Squeegee | Immediately after cleaning |
| Daily cleaning to prevent buildup | Mop | Weekly |
| Documentation of cleaning process | PDF reports | After each session |
Frequently Asked Questions
What pressure cleaning methods work best for concrete surfaces?
Based on my 12 years in the industry, the most effective pressure cleaning methods for concrete involve high-pressure washers with adjustable nozzles to remove grime without damaging surfaces. Using suitable detergents improves results further.
How can I prevent damage when pressure cleaning wood?
To prevent damage when pressure cleaning wood, I use a low-pressure setting, maintain a steady distance from the surface, select suitable cleaning solutions, and always test a small area first to ensure the wood’s integrity is preserved.
What techniques are effective for cleaning brick and stone?
In my experience, using a pressure washer on a low setting effectively cleans brick and stone without causing damage. I recommend applying a suitable cleaning solution to remove stains and mildew, and always test a small area first.
Can pressure cleaning safely remove dirt from glass and windows?
Yes, pressure cleaning can effectively remove dirt from glass and windows when done correctly. Using the right pressure settings and specialized nozzles ensures thorough cleaning without damaging the surfaces, maintaining clarity and longevity.
What is the best approach for vinyl and aluminum siding?
I suggest cleaning vinyl and aluminum siding with a low-pressure washer and mild detergent. This approach effectively removes dirt and mildew while safeguarding the siding’s condition and appearance, ensuring a spotless and durable exterior.
Conclusion
Mastering pressure cleaning techniques for various surface types is essential to maintain the beauty and longevity of your property. By carefully selecting the appropriate pressure settings and cleaning agents, you can effectively clean concrete, wood, brick, stone, glass, and siding without causing damage. Implementing these tailored methods ensures thorough removal of dirt, stains, and contaminants, resulting in spotless and durable surfaces. Investing in the right pressure cleaning strategies not only enhances the appearance of your home or business but also preserves its structural integrity for the long term.
